
706 Conference Room Operations
This page will provide directions on how to operate the resources of the 706 Conference room depending on your meeting format.
First, find the remote labeled MAIN and click the power button to turn on the TVs.
Next, open the cabinet doors to access the JTECH HDMI Matrix that provides content distribution.
Then, set the device according to your desired presentation format.
Instructions below:
1st option : ZOOM Meeting with Screen sharing
2nd option : Casting presentation using Windows Laptops
3rd option : Casting presentation using Macbook Laptops
Operation options
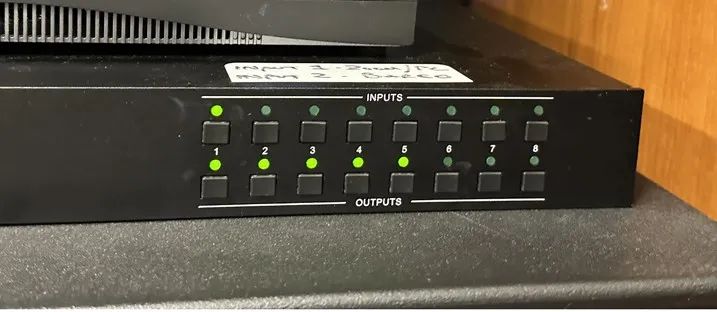
To setup for ZOOM, please do the following:
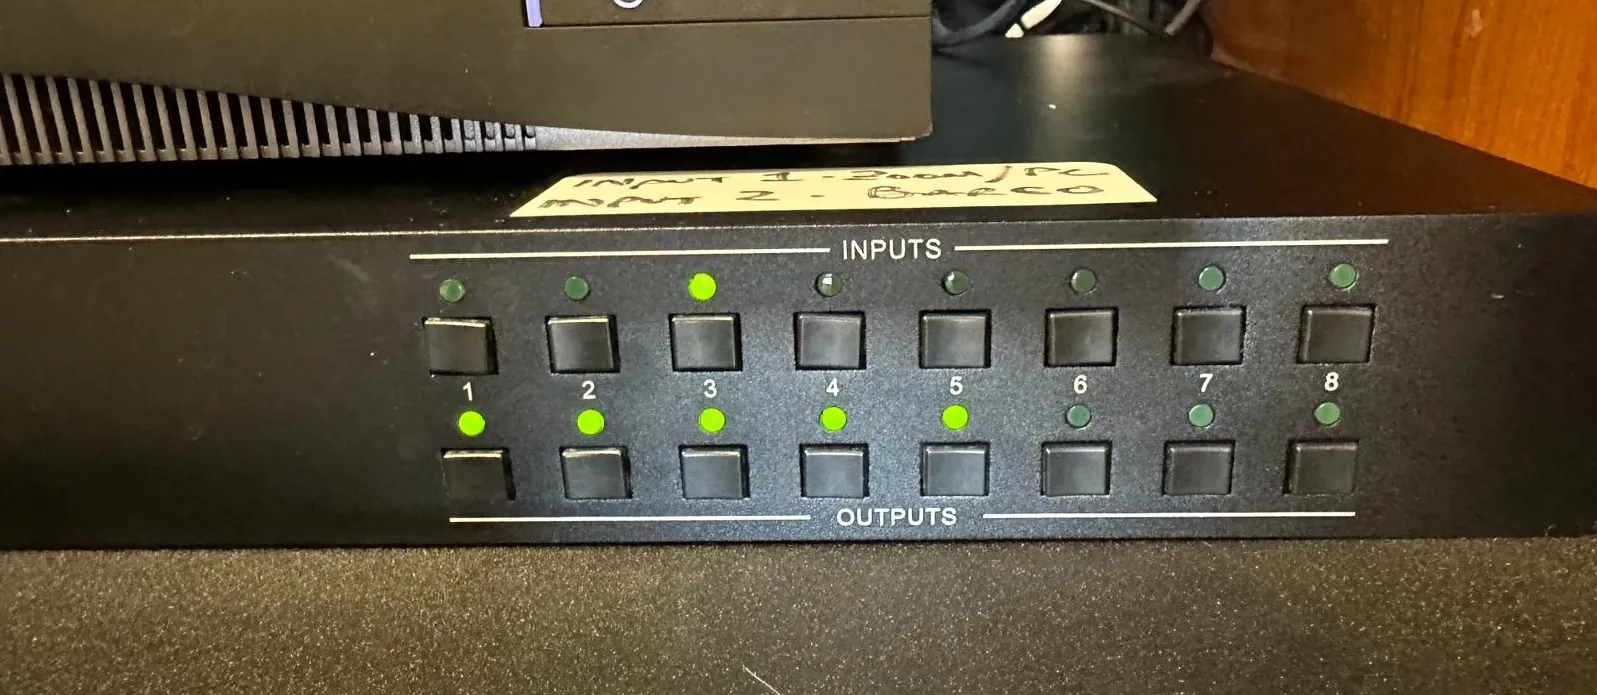
Please press button 1 along the upper INPUT row and proceed to press buttons 1 – 5 along the lower OUTPUT row. The button array will appear the same as the photo
Connecting to ZOOM and Sharing Presentation:
The conference room is equipped with a PC, the KanDao 360 camera, and Shure table mic's.
To make use of this system, kindly follow the steps outlined below:
- The login screen or desktop should be on the displays. Please login if necessary.
- Navigating to Email: Once logged in, you will find a firefox shortcut on the desktop.
The homepage is set to automatically direct you to gmail.com, logged into the account [email protected]. This email is set up to receive ZOOM links and attachments for presentations.
Connect & Share on ZOOM
Presentation Sharing Instructions:
- From the ZOOM email, click on the meeting link to join the virtual meeting.
- The KanDao Camera will be the only camera option.
- The Audio should be LOOPBACK L+R
- Then join the meeting using your personal laptop.
- Important: Disable laptop audio when joining.
- Share your desktop to allow both local and virtual guests to view your presentation.
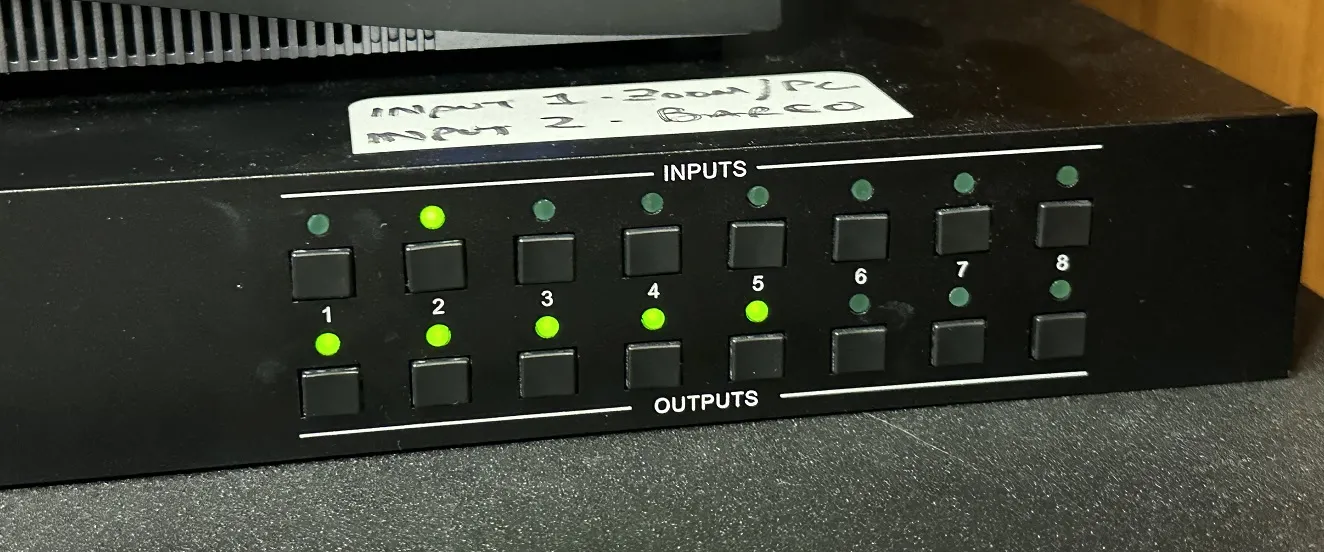
To use Barco Casting for Windows Laptops:
Please press button 2 along the upper INPUT row and proceed to press buttons 1 – 5 along the lower OUTPUT row. The button array will appear the same as the photo
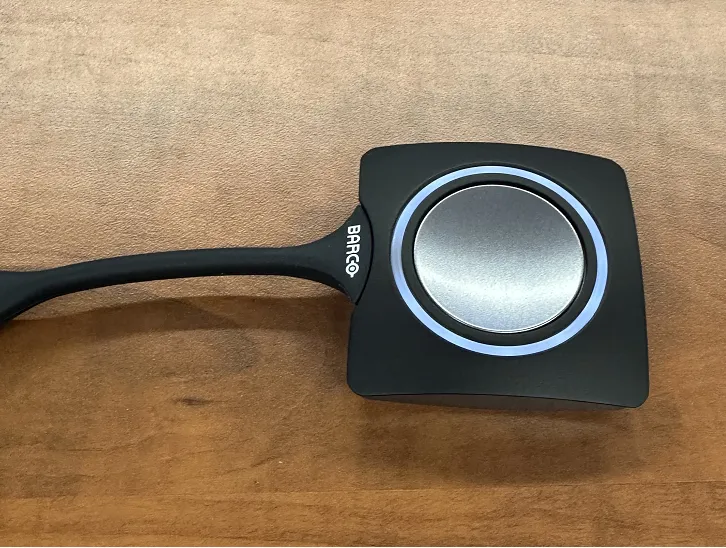
1st. Connect the Barco Wireless receiver to your laptop to begin. Once you have connected the device via USB, it should start blinking a white color.
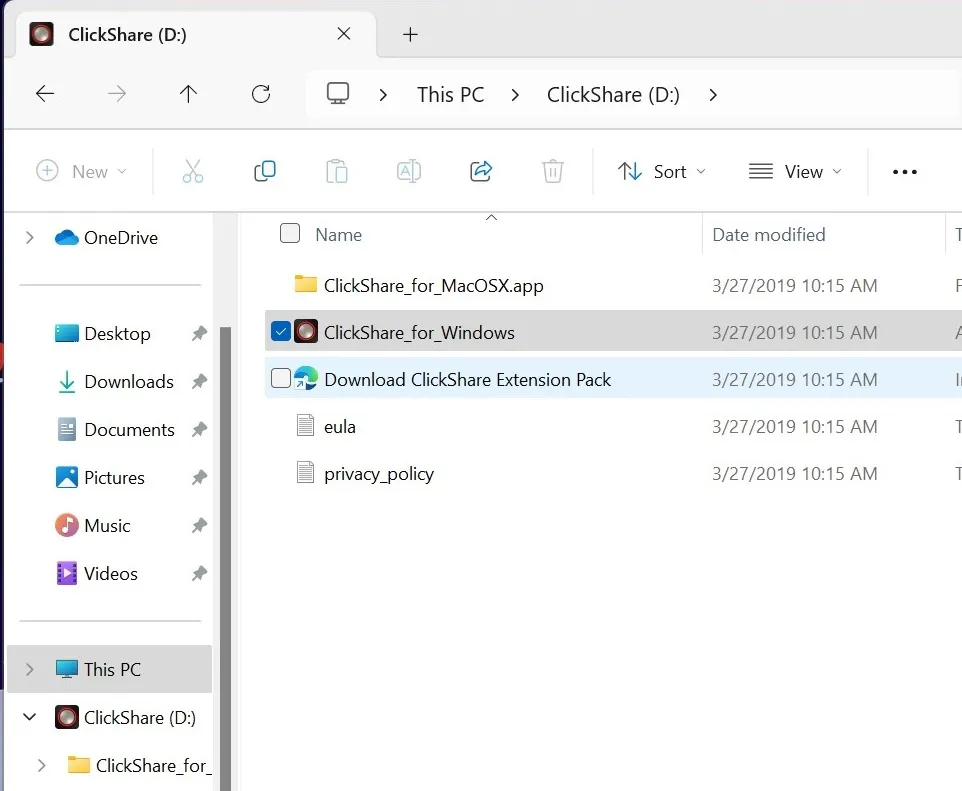
2nd Open Windows Explorer and click on the CLICKSHARE drive that appears.
Then double click on the CLICKSHARE FOR WINDOWS program file.
This will start the software that builds the wireless bridge.
Eventually a window will appear confirm the connection is ready.
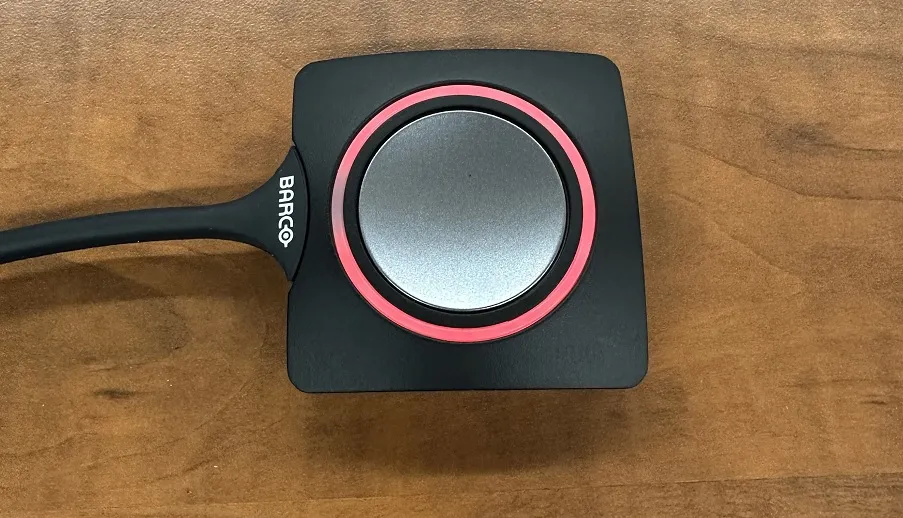
3rd. Press on the center grey button to activate the connection once the circle turns Red.
This should complete the connection process.
Use Apple TV to Cast for Macbook Laptops:
Please press button 3 along the upper INPUT row and proceed to press buttons 1 – 5 along the lower OUTPUT row. The button array will appear the same as the photo
Utilizing Apple TV Receiver for Apple Devices:
- Make sure the Apple TV is turned on with the Grey Controller
The Apple TV black box will have a red light to confirm its on.
- The TVs will show the following screen with info on how to connect to the WiFi.
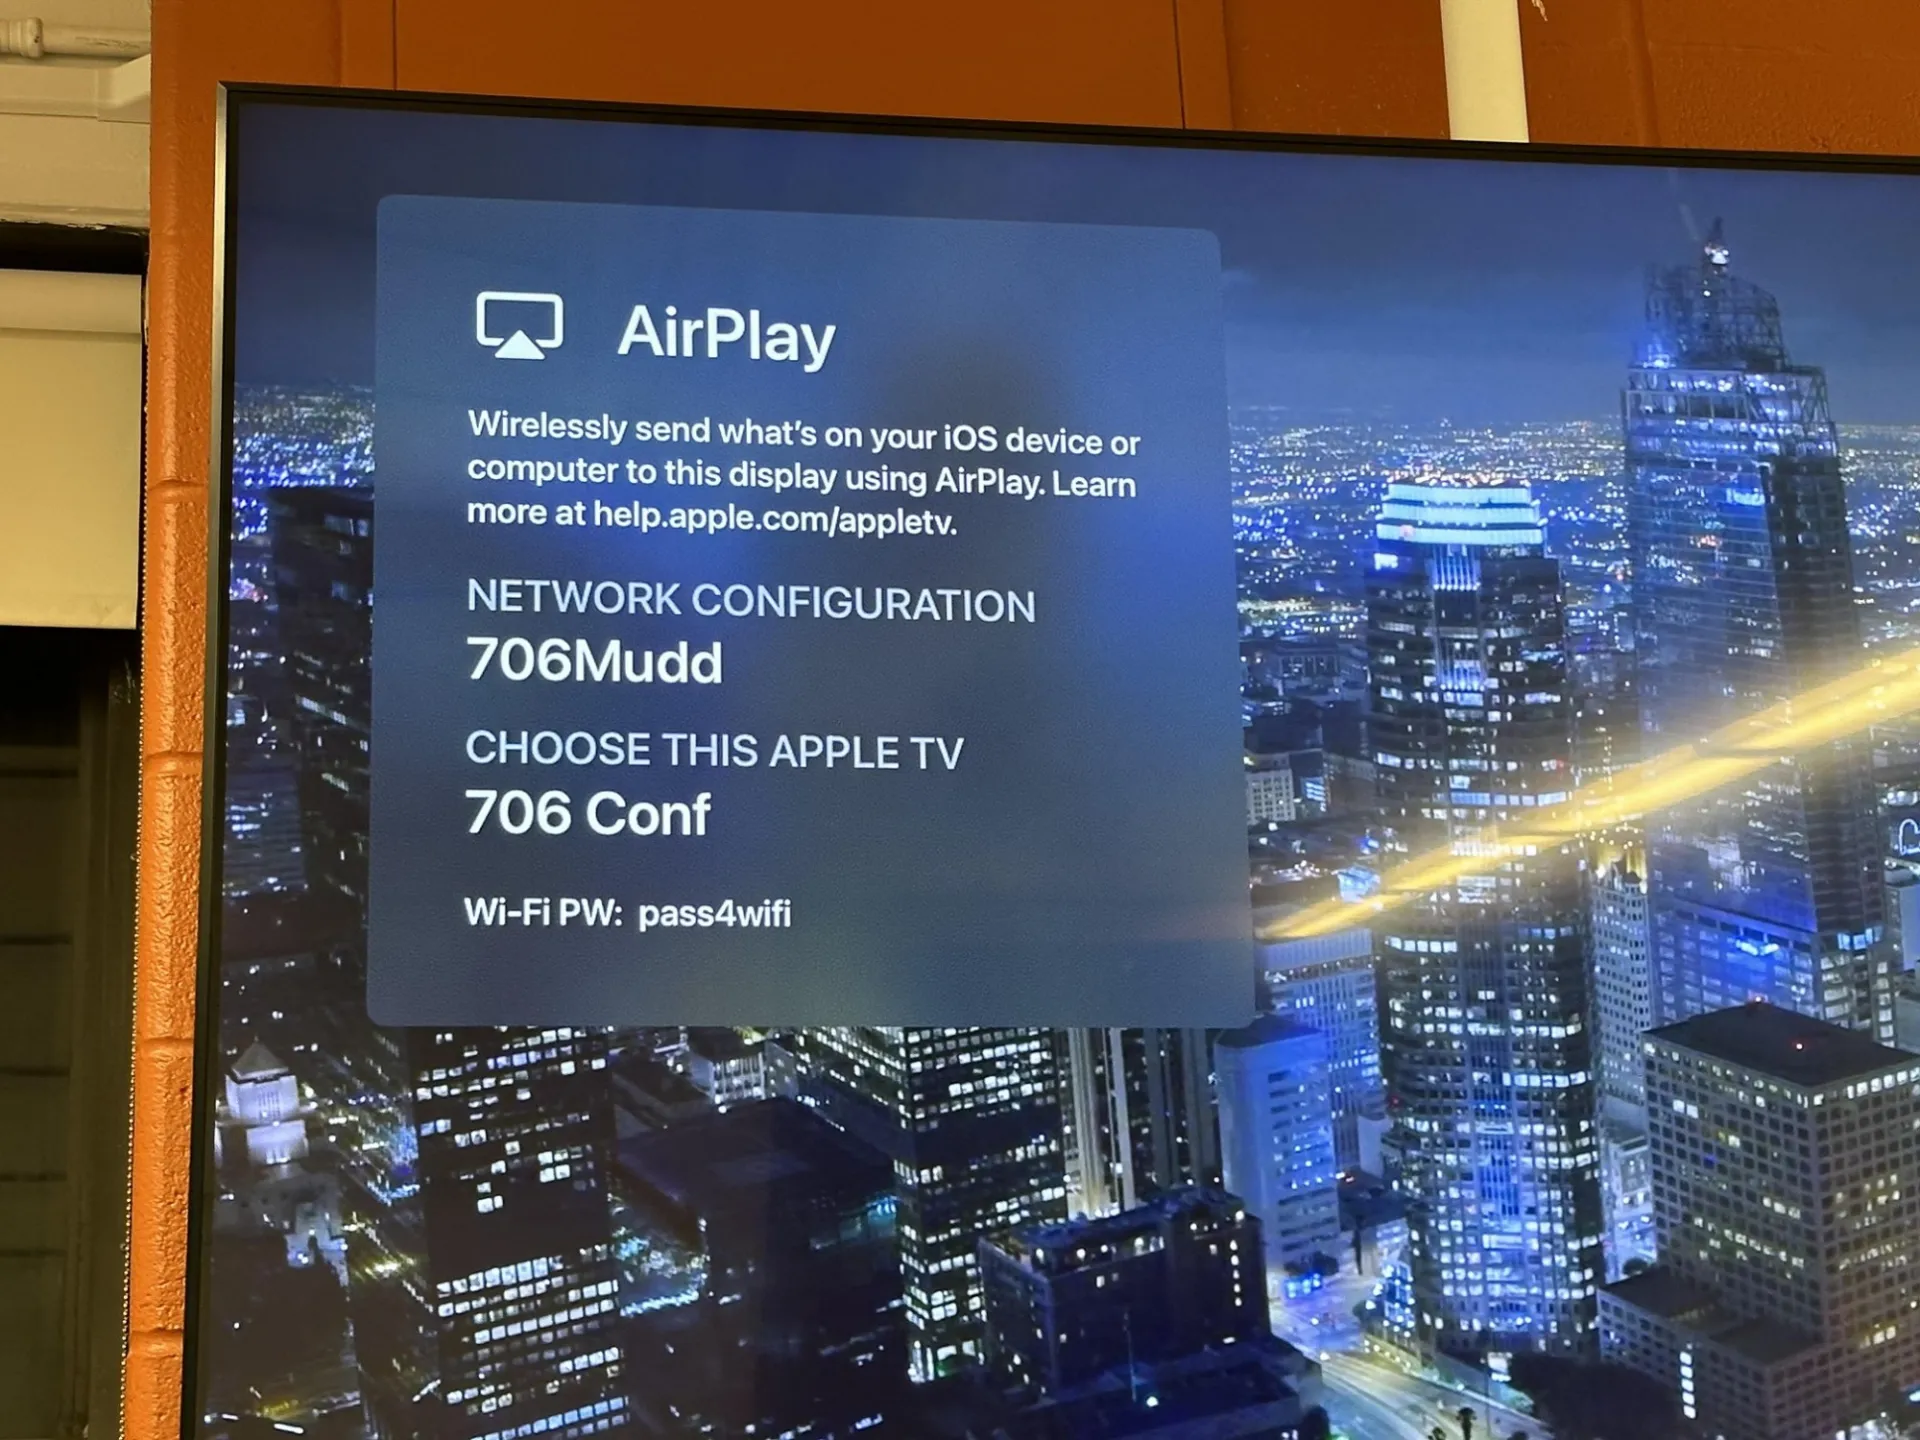
- Once connected, click on the SETTINGS ICON in the top right corner of your Macbook.
- This will show the options tab and will provide access to SCREEN MIRRORING.
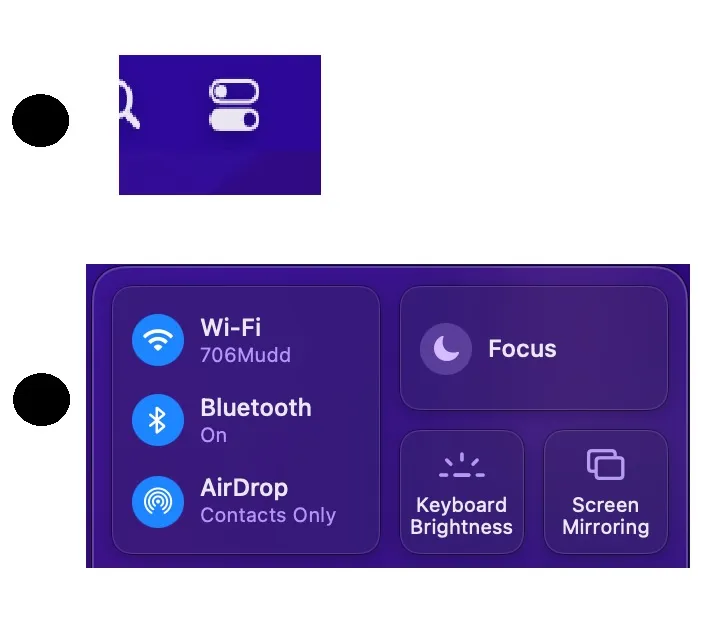
- Click on 706 Conf
- A 4 digit pin will appear on the TV, please input to complete connection.